Micro-Plus

- Eliminate lime scale formation
- Remove silt, sediment and other suspended matter
- Remove chlorine and other objectionable tastes and odors
- Complete treatment for up to six months
Description:
More than a filter, more than a feeder, Micro Plus is the complete treatment program for commercial ice makers, coffee urns and brewers, beverage machines and other water-using equipment such as humidifiers, steamers and residential refrigerator ice makers.
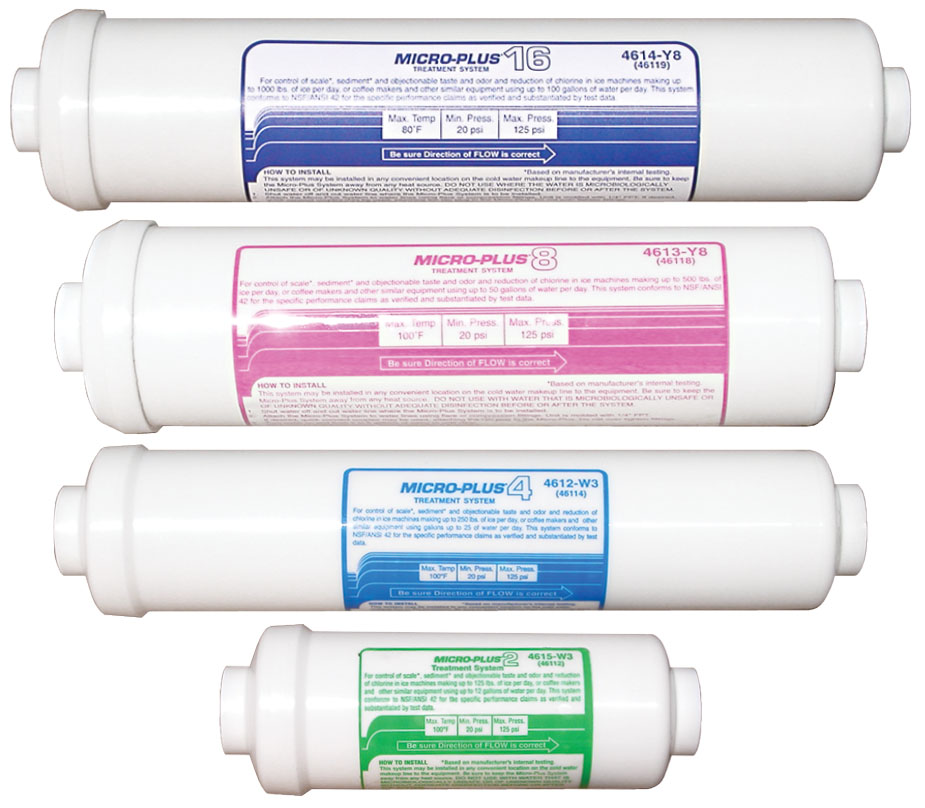
Micro-Plus Treatment Systems are available in a variety of size capacities, from the Micro-Plus 2, which can be used on equipment using up to 12.5 gallons of water per day, to the Micro-Plus 16 for treating up to 100 gallons of water per day. Micro-Plus systems are designed and manufactured to eliminate or control the three primary water-related problems: lime scale, silt and sediment, and objectionable tastes and odors encountered in ice makers, coffee urns and other equipment. These problems all reduce the designed capacities of this equipment, and they cause operation and service costs to increase.
| Packaging Size | Part Number | Additional Info |
|---|---|---|
| Micro-Plus 2 | 4615-W3 | |
| Micro-Plus 4 | 4612-W3 | |
| Micro-Plus 8 | 4613-Y8 | |
| Micro-Plus 16 | 4614-Y8 |
Directions:
General Installation/Operation Condition
- Do not use with water that is microbiologically unsafe or of unknown quality without adequate disinfection before or after the system.
- Installation must comply with state and local laws and regulations.
- Filters may be installed in any convenient location.
- Be sure to keep filters away from any heat source.
- Filters must be changed every six months or when capacity expires, whichever comes first.
- The standard period for storage and preservation of filter products is one year. This is simply a precaution, as under normal conditions these filters should last indefinitely.
Installation Steps
- Shut off water.
- Disconnect existing filter or cut water line where filter is to be installed.
- Install compression or flare fittings, or “Quick Connect” fittings.
- Use thread tape or equivalent where appropriate.
- Insure proper direction of water flow and connect inlet. USE TWO WRENCHES.
- Flush 5-6 gallons of water to drain as described above.
- Turn off water and connect outlet. USE TWO WRENCHES.
- Carefully turn on the water and check for leaks.
- Check the filter after approximately 8 hours for slight leaks not visible during initial installation.
For more Instructions and Guidelines please download bulletin 3-20 by click on the "Product Information" tab.
Product Information:
Literature Downloads
Download the product bulletin and other relevant literature here.
- MICRO-PLUS 2, 6X1 CS Product Bulletin
- MICRO-PLUS 2, 6X1 CS Application Bulletin
- MICRO-PLUS 4, 6X1 CS Product Bulletin
- MICRO-PLUS 4, 6X1 CS Application Bulletin
- MICRO-PLUS 8, 6X1 CS Product Bulletin
- MICRO-PLUS 8, 6X1 CS Application Bulletin
- MICRO-PLUS 16, 6X1 CS Product Bulletin
- MICRO-PLUS 16, 6X1 CS Application Bulletin
- ICE MACHINE CLEANING & FILTRATION APPLICATION BULLETIN
Labels
Download a low resolution file of the product label here.
